
Easy Apple Pocket Pies


Did I have you at “easy”? These apple pocket pies are so adorable, so yummy and so easy to assemble. All you need is a great pie dough, store-bought apple pie filling (hey, I normally wouldn’t recommend it but, after all this is the easy version). You’ll also need a 3.5-4” round cookie cutter.
 
Let's make apple pocket pies!
 
First, you'll need a foolproof pie crust recipe. I love Ina Garten's perfect pie crust recipe:
 
Ingredients:
  • 12 tablespoons (1 1/2 sticks) very cold unsalted butter
  • 3 cups all-purpose flour
  • 1 teaspoon kosher salt
  • 1 tablespoon sugar
  • 1/3 cup very cold vegetable shortening
  • 6 to 8 tablespoons (about 1/2 cup) ice water
 
Directions:
Dice the butter and return it to the refrigerator while you prepare the flour mixture. Place the flour, salt, and sugar in the bowl of a food processor fitted with a steel blade and pulse a few times to mix. Add the butter and shortening. Pulse 8 to 12 times, until the butter is the size of peas. With the machine running, pour the ice water down the feed tube and pulse the machine until the dough begins to form a ball. Dump out on a floured board and roll into a ball. Wrap in plastic wrap and refrigerate for 30 minutes.
 
 
Roll out your dough.

 
Use your cookie cutter & start cutting...


This actually tastes like homemade apple pie filling!
(It will be our little secret.)
 
 
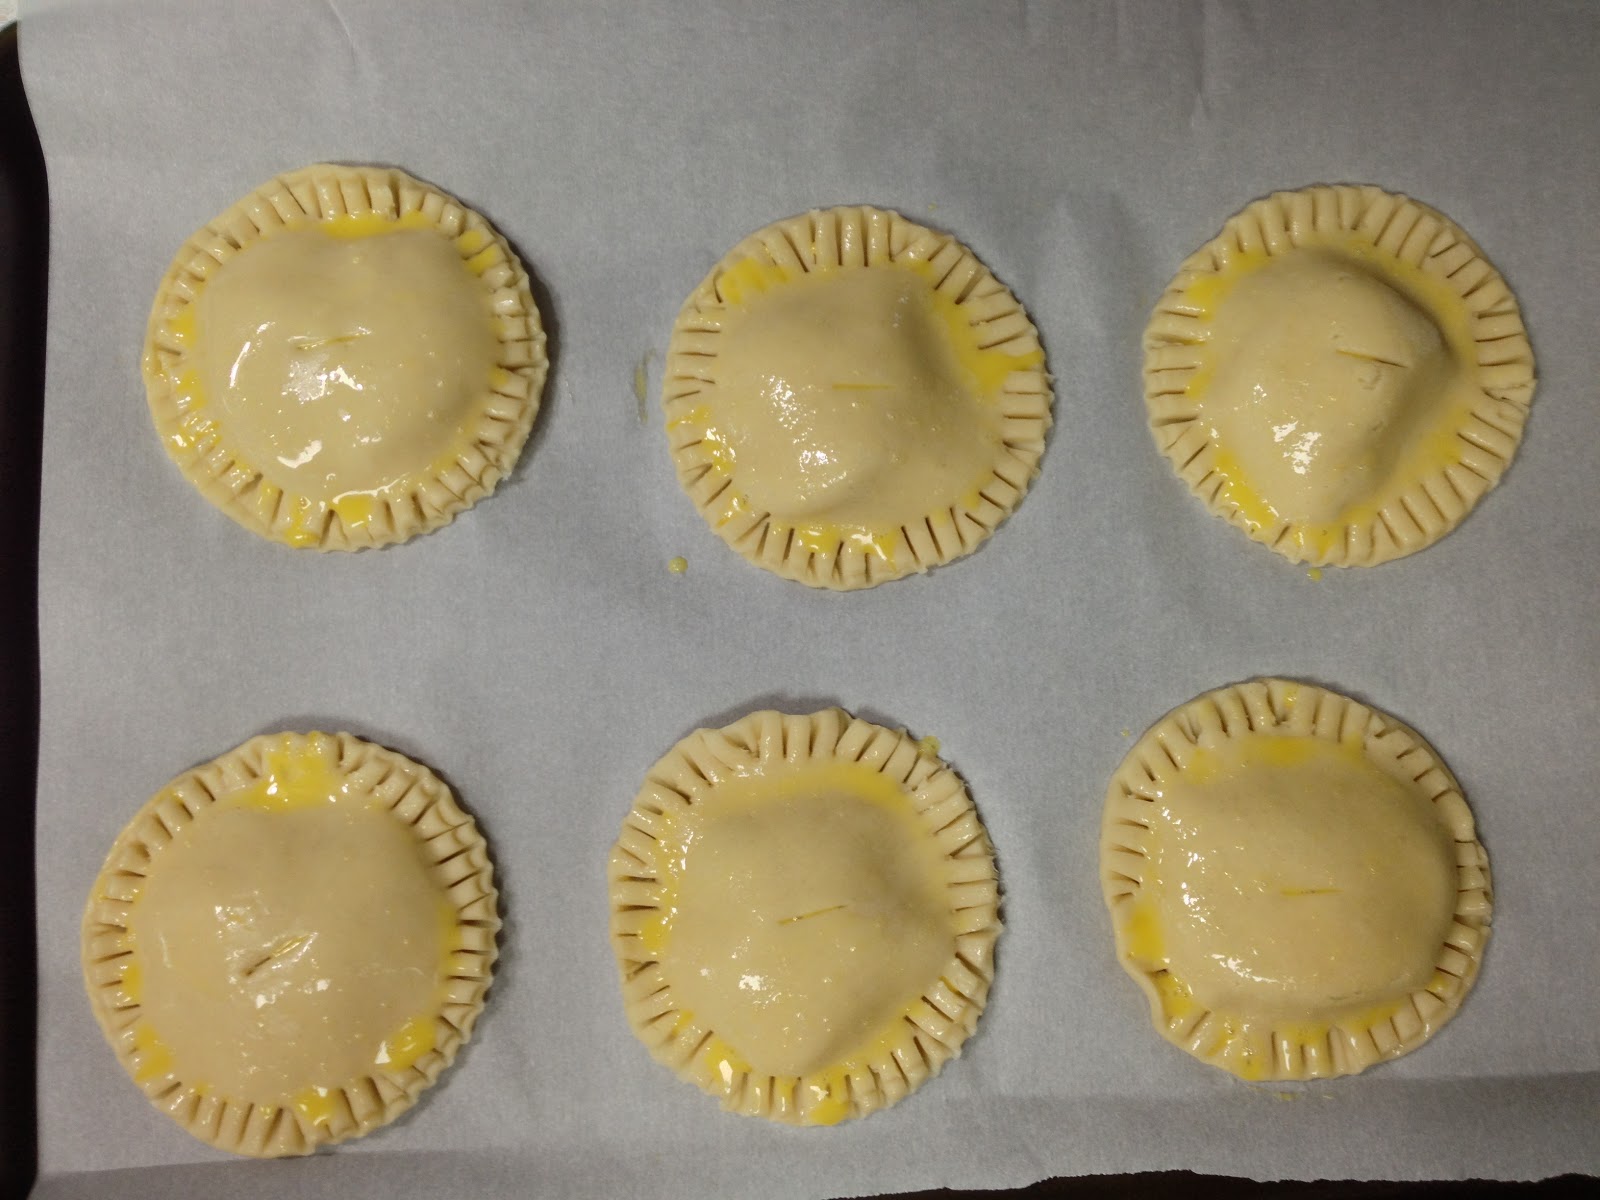
Place spoonfuls of the apple pie filling in the center, allowing some room to crimp the edges.

 
Place the dough tops and start crimping the edges with a fork.
Brush tops with a simple egg wash (1 egg + 1 Tbsp. water).
Cut 1/2" slits on tops, this allows the steam to vent.
Bake at 400 degrees for 20 minutes.
 
 
Aren't they cute! Cute enough to put in your pocket!


Popular posts from this blog

DIY Mr. Potato Head Busy Board

Keep the little ones busy while they learn about their 5 senses. This Mr. Potato Head busy board is simply made with felt. Remember, felt naturally sticks to itself so the fun and possibilities are endless! Stuff You'll Need: - felt in various colors - scissors - hot glue gun  Directions: 1. Cut a large potato-shaped body out of light brown felt. 2. Make your eyes, ears, nose, mouth and arms. You can make additional fun accessories like a hat, shoes, bag, etc. Get creative! Here's Mrs. Potato Head! Emma and her masterpiece!

DIY Felt Ice Cream Truck Quiet Board

I'm constantly finding new ways to entertain my little tot while I try to get work done. This adorable felt ice cream truck quiet board will keep the little ones busy, plus they can work on their counting skills, colors and building skills. And remember, felt naturally sticks to itself so the fun never ends! Stuff You'll Need: - a 20" x 15" foam board - scissors - box cutter - hot glue glue - white felt - felt in assorted colors for your truck accessories and ice cream treats Directions One: Two: Three: Cut out an ice cream truck canopy, window, truck divider & wheels out of felt (in your choice of colors). Four: Glue all the above onto your felt-covered board using your hot glue gun. Five: Create your ice cream treats! This is the fun part and the possibilities are endless. Here's Emma's "Menu" of ice cream treats I've made: happy creating! xo

Au revoir! Catch me on Instagram

I initially started this blog in 2010 to chronicle  my baking adventures. In 2013 I became a mother and this space shifted to sharing my DIYs and inspiration for creative living. Since then, I've been fortunate to work with multiple companies producing creative editorial content. As I look back at this blog, I'm reminded of how your passions can actually unfold into a career. And if you're really patient and willing to put in the all the work, dream jobs do come true. So it is here where I say au revoir to my beloved blog, aka my creative journal. You can still find me on @craftedbyjen .  xoxo, Jen